skip to main |
skip to sidebar
The recipe for peach jam is here from 2012.
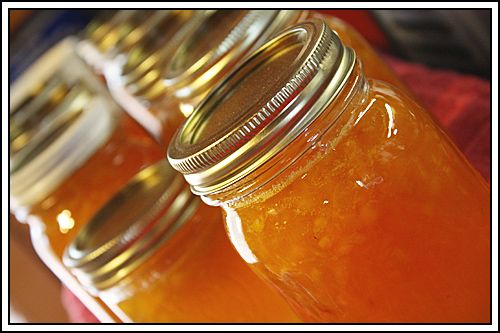
I just wanted to share the photo from this year because it looks so beautiful!!
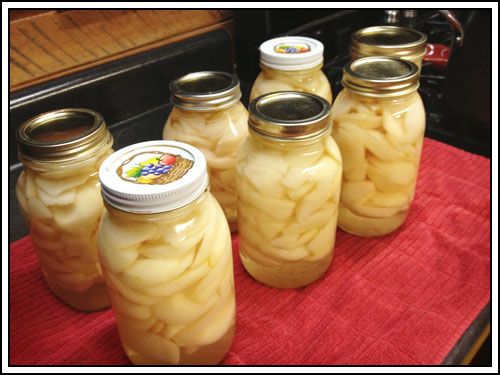
It's that time of year! I canned 7 quarts of pears last night. The tree is still loaded with pears and I have another tree that will ripen in a couple of weeks. Pears, unlike peaches or apples, can be picked early and they will continue to ripen. I pick them early, wrap them in newspaper and let them set in my dark pantry for a few days. This lets them get to that perfect ripeness.
 How To Can Pears
Pears
Sugar
Water
Jars
Lids and Rings
How To Can Pears
Pears
Sugar
Water
Jars
Lids and Rings
Wash and peel your pears. I slice mine into about 1/4-inch slices, discard the hard middle containing the seeds. I use a lot of my canned pears to make Pear Custard Bars. When I get tired of slicing all those pears, I start canning them as halves! Makes the job go much faster and these are great for the boys when they want a snack.
I slice the pears into a large bowl of water with 3 tablespoons of lemon juice added to keep them from turning dark while I'm getting them ready to put into jars.
While I'm doing this, I'm running my jars through the hot cycle on the dishwasher, you can put them in boiling water for 5-10 minutes to sanitize them as well. I also have my large canner on the stove with water heating for the hot water bath part of canning and I put my lids and rings in a small sauce pan over low heat in very hot (not boiling) water.
About 15 minutes before I finish the peeling and slicing, using a large pot, I put 6 cups of water and slowly add 2 cups of sugar over medium heat, stirring constantly to dissolve the sugar. Bring this to a gentle boil. This makes a light syrup and will fill approximately 7 quarts of pears. See the chart below for medium and heavy syrup recipes.
When the pears are all sliced, using a slotted spoon, remove them from the water/lemon juice and pack them into your hot jars. Make sure the pears are as flat as possible or you'll have a very large gap at the bottom of your jar when your finished.
When your jars are packed with pears, pour the boiling sugar water over the pears leaving 1/4-inch head space. Using a butter knife or a wooden skewer, run it around the inside of the jar to release any air bubbles. Wipe the rim of your jar with a damp cloth then adjust hot lids and bands to finger-tight.
Put jars in the hot water bath. Water should be about 1 inch above jar lids. Cover and bring to a rolling boil. Start timing your water bath when it begins to boil.
For quarts, 25 minutes. For pints, 20 minutes.
Remove from hot water bath and let sit until cooled. Lids should be sealed when cooled! That's it, go can some pears!
Syrup (sugar to water ratios)
Heavy syrup: 4 cups of sugar to 6 cups of water
Medium syrup: 3 cups of sugar to 6 cups of water
Light Syrup: 2 cups of sugar to 6 cups of water
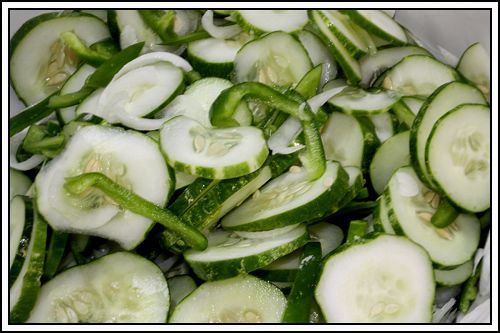
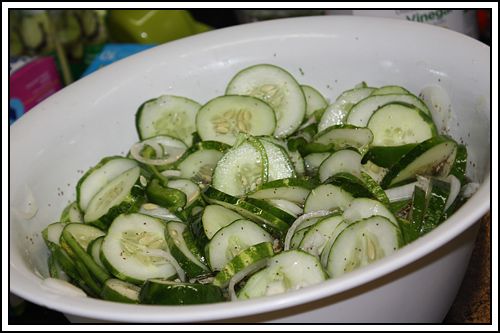
Not sure what to do with all those cucumbers? This recipe is simple, quick, doesn't require boiling, bathing or processing.....
Quick and Easy Freezer Pickles
7 cups of cucumbers (sliced)
1 cup of bell peppers (sliced)
1 cup of onion (sliced)
1 cup white vinegar
2 cups sugar
2 tsp salt
1 tsp celery seed
Thinly slice your cucumbers, onions and bell peppers and mix together.
Mix vinegar, sugar, salt and celery seed and pour over sliced veggies and stir.
 Marinate over night in the refrigerator, stirring a couple of times.
Using a slotted spoon, pack cucumbers, onions and peppers into freezer containers or zip lock freezer baggies, then add enough of the liquid from bowl to cover pickles.
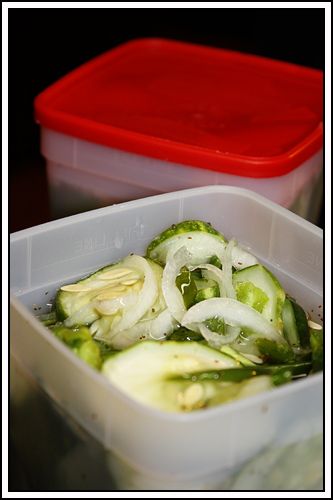 Close tightly and place in freezer.
(That is if you can keep from eating them all while putting them in containers!)
Close tightly and place in freezer.
(That is if you can keep from eating them all while putting them in containers!)
When you want to use them, remove them from the freezer in time for pickles to thaw. I usually take them out the night before and put them in the refrigerator. They'll be as crispy and sweet as they were when you first made them!
Delicious, whatever you want to call them.......it'll make your taste buds sing!
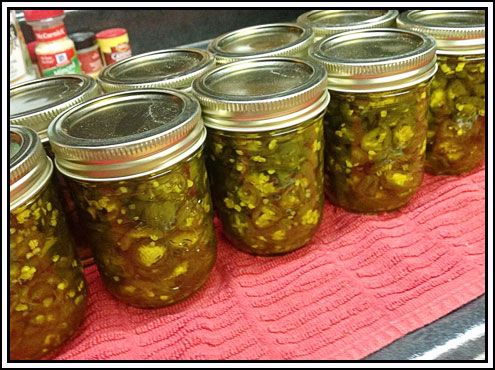
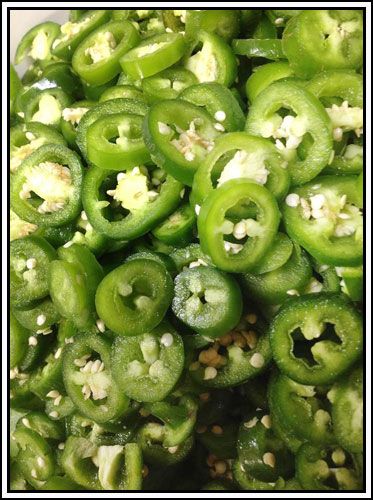 Cowboy Candy
3 pounds fresh, firm jalapeños
2 cups cider vinegar
6 cups granulated sugar
1/2 teaspoon tumeric
1/2 teaspoon celery seed
3 teaspoons granulated garlic (or 1 1/2 tsp garlic powder)
1 teaspoon cayenne pepper
Wash your jalapeños
Remove the stem and slice into 1/8 to 1/4 inch slices. Please wear gloves when you're doing this or you will regret it!! The first time I chopped jalapeños when canning, my fingers burned FOREVER! Well, not forever, but it felt like it!
Mix vinegar, sugar, tumeric, celery seeds, garlic and cayenne pepper together in a large pot. Bring to boiling. Reduce the heat and simmer for 5 minutes. Add the jalapeños! Bring back to boiling. Reduce the heat and simmer for 5 more minutes.
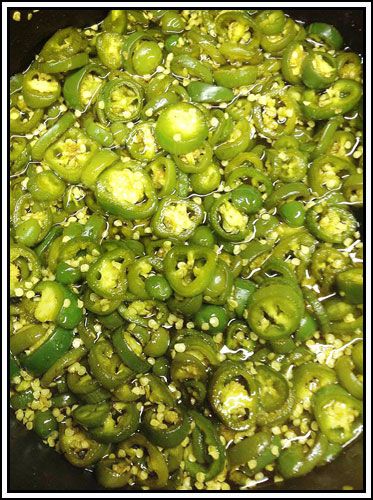 Use a slotted spoon to transfer the pepper into hot, sterile half pint or pint canning jars. Take the liquid from your pot and pour over the peppers in the jar, leaving 1/4 inch head space. Using something (I use a wooden kabob stick), remove any air from the liquid in the jar. I just poke around in there 3 or 4 times to make sure all the little bubbles get loose. Add your hot lids and bands and process in a hot water bath.
(10 minutes for half pints/15 minutes for pints)
Yield: 6 half-pint jars
(I doubled the recipe and got 10 but I packed the peppers pretty tight before adding the liquid.)
Use a slotted spoon to transfer the pepper into hot, sterile half pint or pint canning jars. Take the liquid from your pot and pour over the peppers in the jar, leaving 1/4 inch head space. Using something (I use a wooden kabob stick), remove any air from the liquid in the jar. I just poke around in there 3 or 4 times to make sure all the little bubbles get loose. Add your hot lids and bands and process in a hot water bath.
(10 minutes for half pints/15 minutes for pints)
Yield: 6 half-pint jars
(I doubled the recipe and got 10 but I packed the peppers pretty tight before adding the liquid.)
 Then the HARD part! You need to wait 2 weeks to a month for all the tastes to mellow and turn into awesomeness! I tried someone else's......I have 9 days to go before I can try mine! I'm not sure I'm going to make it!
Hope you enjoy yours!!
Then the HARD part! You need to wait 2 weeks to a month for all the tastes to mellow and turn into awesomeness! I tried someone else's......I have 9 days to go before I can try mine! I'm not sure I'm going to make it!
Hope you enjoy yours!!
ANNOUNCEMENTS
For those of you who are new followers/readers, don't forget to check out the forum and join in on our discussions there.
My Country Blog of This and That Forum
I love each and every comment my blogging friends leave for me!
All images and graphics on this page were made by me with the exception of that little rooster! He came from Beth Logan's Checkered Chickens at pccrafter.com. Photos were taken by me and graphics were created using Photoshop CS2.
If you see something you like please ask for permission before using it!
Thank you!